


Hoy os presentamos un DIY (do it yourself) ¡tachuelizando ropa! Es una manera de reutilizar prendas antiguas que ya no sueles ponerte o de las que ya te has cansado usando distintas tachuelas según tus gustos y estilos. A simple vista parece una cosa complicada ya que muchas pensaréis cómo hacerlo para engancharlas y que no se caigan o sufriréis por si dejan marcas en la ropa.
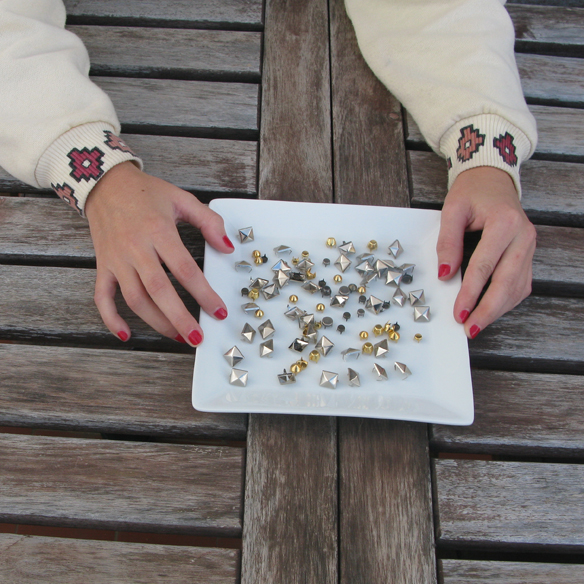
Lo único que necesitamos para este DIY son las tachuelas especiales para ropa. Nosotras las hemos comprado en la tienda El Taller (hay unas cuantas en Barcelona), pero también podéis encontrarlas en mercerías o en la web www.amazon.es donde hay infinidad de modelos y a muy buen precio. Puedes enganchar las tachuelas perfectamente con las manos gracias a una especie de grapa que hay en el reverso de la tachuela y que facilita mucho su aplicación. Ahora bien, para que todavía sea más fácil colocarlas podemos utilizar un limador de uñas para así prensar la tachuela rápidamente y para que no te duelan los dedos. Cuando decimos limador de uñas nos referimos a algún utensilio rígido y de superficie plana (también puedes utilizar un cuchillo o unas tijeras).
Today we present a studding DIY (do it yourself)! It is a way to reuse old clothes that you don’t wear anymore or that you’re already tired of wearing using different studs to suit your taste and style. At first it seems complicated because many of you will think about how you hook them on and how you don’t want them to fall or how you will suffer if they leave marks on your clothes.
All you need for this DIY are special studs for clothes. I’ ve bought them in the shop El Taller (there are a few in Barcelona), but you can also find them in haberdashery shops or on www.amazon.com where there are infinite models and at a very good price. You can hook the studs on perfectly with your hands thanks to a kind of staple at the back of the stud that makes it easy to use. Now, to make them even easier to hook on, we can use a nail file to press the stud quickly and so you do not hurt your fingers. When I say nail file, we are referring to a tool that has a rigid and flat surface (you can also use a knife or scissors).

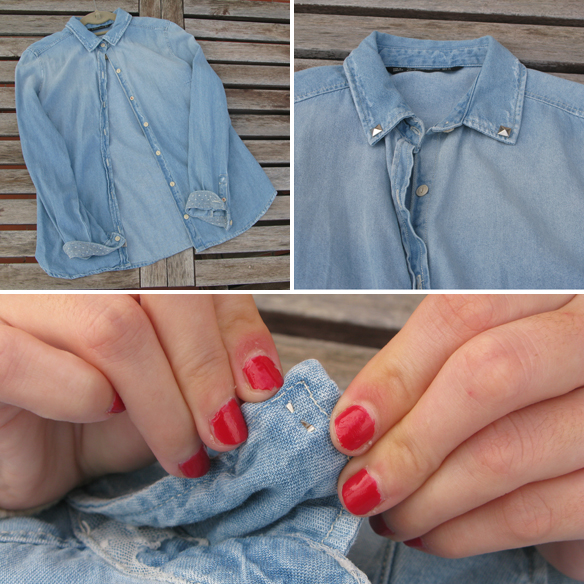
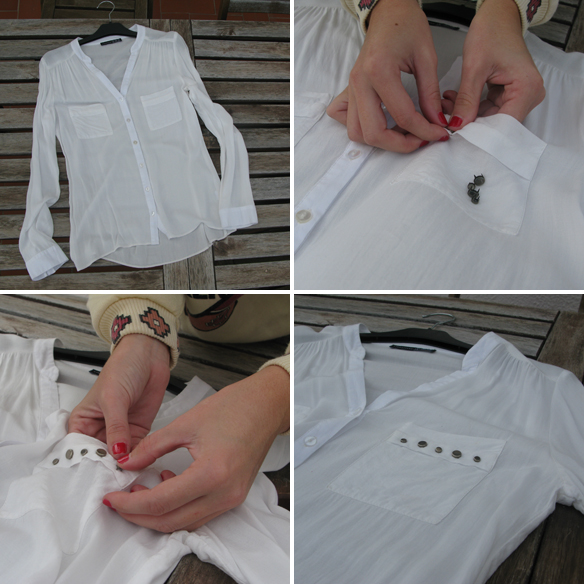
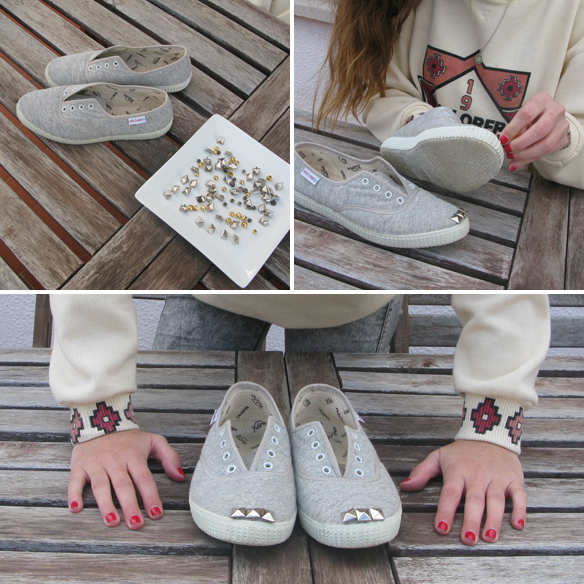
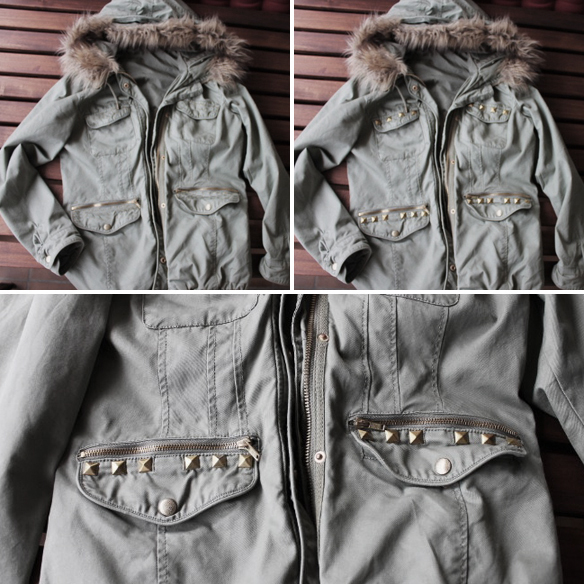
La utilización es bien sencilla. Simplemente cogemos la tachuela y atravesamos la prenda gracias a la grapa que como antes hemos dicho encontramos en el reverso de esta. Una vez atravesada, con los dedos o el limador presionamos la grapa y esta queda perfectamente sujeta sin riesgo a que se caiga. En nuestro caso hemos escogido tachuelas doradas, plateadas y grises. Las hemos colocado en una camisa tejana, dos pantalones, dos blusas blancas y una rosa, dos bambas Victoria, y un abrigo verde militar.
The use is simple. I simply take the stud and put it through the garment thanks to the staple at the back of the stud as mentioned previously. Once through, with your fingers or a nail file, we press the stud and it stays perfectly attached without a risk of falling. In this case, I have chosen gold, silver and grey studs. I have put them on a denim shirt, two trousers, two white blouses and one pink, two Victoria sneakers, and a green military jacket.

Teóricamente estas tachuelas no estropean las prendas ni dejan marcas en ellas pero por si acaso, recomendamos utilizar ropa que queramos aprovechar, aquella que usamos desde hace tiempo o que tenemos abandonada en el armario, en vez de por ejemplo una blusa nueva de Mango comprada hace dos días. De todas maneras, yo después del DIY quité las tachuelas de una camiseta para volver a colocarlas de otra manera y la camiseta estaba perfectamente solo que con unos pequeños agujeritos que a simple vista nadie ve.
También recomendamos utilizar ropa no muy gruesa porque facilita mucho las cosas a la hora de enganchar las tachuelas. Con materiales como por ejemplo el cuero, cuesta mucho más atravesarlo y puedes estarte horas hasta conseguirlo. ¡Ah! Y si tenéis la duda de si a la hora de lavar la ropa las tachuelas se soltarán o no, podéis estar seguras de que no sucederá ya que una vez la grapa de la tachuela esté bien sujeta a la prenda, es imposible que se caigan.
In theory, these studs do not spoil clothes or leave marks on them, but just in case, I recommend using clothes we want to take advantage of, that we haven’t used for some time or abandoned it in the closet, instead of a blouse bought at Mango two days ago for example. In any case, I removed the studs from a blouse after the DIY and placed them differently and the blouse was perfect only with a few very small holes that can hardly be seen.
I also recommend not using thick clothes because it makes things easier when hooking the studs on. With materials such as leather, it costs a lot more to push them through and you can spend hours doing so. Ah! And if you doubt whether when it comes to washing clothes the studs will fall off or not, you can be sure that that this will not happen because once the staple of the stud is properly secured to the garment, it is impossible for it to fall.
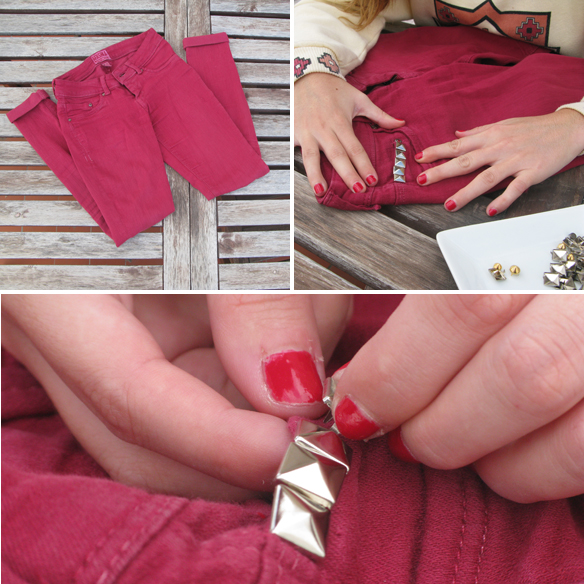
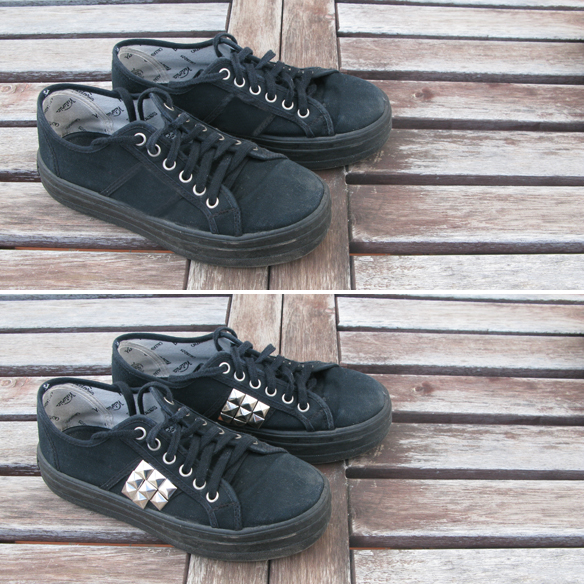
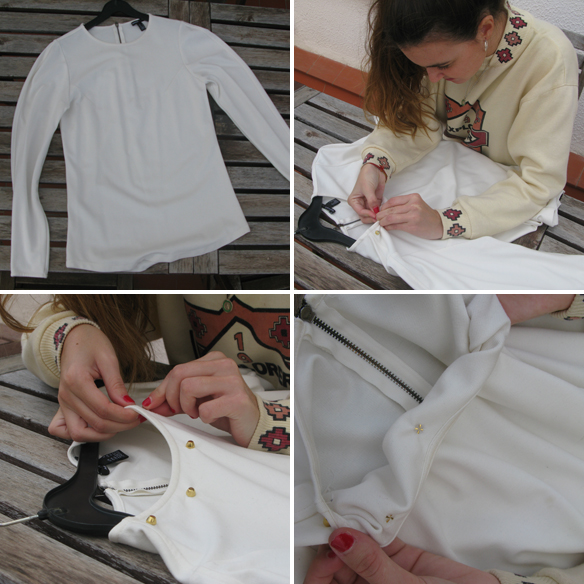
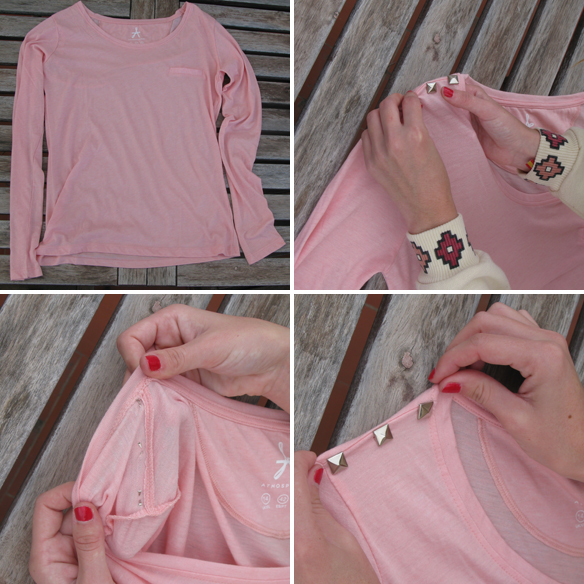
En los pantalones granates, los shorts y las Victoria negras, las tachuelas plateadas han dado un toque roquero. A la blusa blanca le hemos puesto unas cuantas doradas las cuales dan un aire de sutileza y elegancia. A la camiseta rosa (caracterizada por la simplicidad), le hemos puesto otras tachuelas plateadas que ayudan a que ya no veamos una simple camiseta, sino una camiseta con un adorno monísimo en los hombros.
Esperamos que este DIY: tachuelízate os haya sido útil y ¡podáis llevarlo pronto a la práctica! :) ¡Feliz fin de semana!
In the maroon trousers, the shorts and the black Victoria, the silver studs have given them a rocker look. We have put a few golden studs on the white shirt which give a air of subtlety and elegance. I have put other silver studs on the pink shirt (characterised by simplicity) which help to not see it as simple, but with a really cute detail on the shoulders.
I hope this studding DIY has been helpful and you may be able to practise soon! :) Happy weekend!

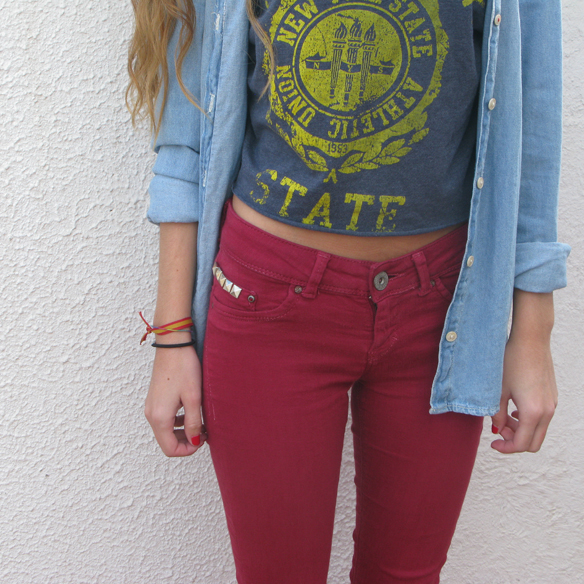

Camiseta rosa/Pink t-shirt: Primark FW 12/13
Pantalones granate/Maroon pants: Bershka FW 12
Blusas blancas/White blouses: Mango & Primark FW 12/13
Bambas/Trainers: Victoria (old)
Camisa tejana/Denim shirt: Zara (old)
Shorts: Zara (old)
Abrigo/Coat: Bershka FW 12
post by Blanca Sabadell

Un comentario en “DIY: ¡tachuelízate!”